Masterkeys are basically miniature shotguns that can be attached onto tactical rails on a rifle. They’re great for CQB (Close Quarter Battle) because they have a wide spray radius and can take down multiple targets at a time. However, airsoft masterkeys are expensive and usually require Green-Gas to operate. In this post you’ll learn how to make a effective airsoft masterkey that operates without gas that’s made from inexpensive, household items.
This is what you’ll need:
- An airsoft rifle that has tactical rails, preferably with holes lining the hand-guard. For example, the Crosman Stinger R34 is a perfect gun to use.
- A toilet paper roll
- Spray paint (I’d recommend using a standard color [black, OD green, etc.] for tactical reasons, but you can use a more creative color if you want to be unique)
- Bright orange duct-tape
- A sturdy balloon (try to keep it the same color as the spray paint you’re using)
- A flat piece of wood, about as long and a little bit skinnier than the toilet paper roll (the wood from a mousetrap is perfect)
- 3 zip-ties
- A red-dot sight (this is completely optional, but it just helps aiming a little bit. Plus the red-dot sight only applies if you decide to mount it on the side instead of the bottom [I’ll explain mounting options later on]. However, if you do want the red-dot sight also get a fourth zip-tie)
- Heavy duty tape (duct-tape will do)
Step 1: Cut the neck off your balloon so that there’s a wide opening. Don’t cut it too far down, but just down of where the narrow neck begins to widen. You can discard of the cut-off neck.
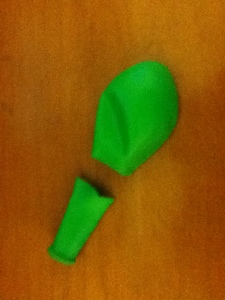
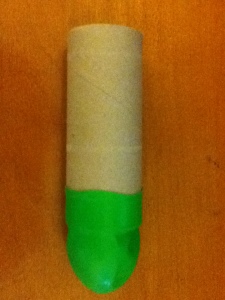
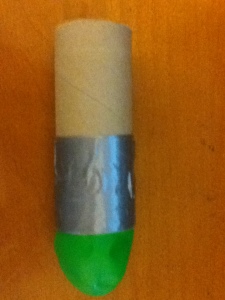
Step 2: Now take your toilet paper roll and fit the balloon over one end of it. Only have about an inch of the balloon actually over the toilet paper roll, the rest of it should just be hanging off the end. Once you have gotten the balloon about 1 inch over the toilet paper roll you can then tape it down with the heavy-duty/duct-tape. Make sure to tape it down firmly and to wrap it in several layers of tape to insure that it won’t come undone.
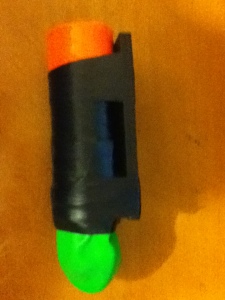
Step 3: Take the small piece of wood and tape it onto the toilet paper roll. But, only tape it down on either end, leaving the middle open so that you’ll be able to sqeeze the zip-ties in between the wood and the toilet paper roll later on. Make sure to tape it down tight enough so that the wood and toilet paper roll won’t become separated, but not so tight that you crush the toilet paper roll and that you’ll have enough leeway to sneak the zip-ties in-between. In the side-image below I taped the wood down with black tape so that you can see where you’re suppose to put it.

Step 4: Now you can spray paint the entire thing (try not to spray paint the balloon because it won’t be as stretchable). After the paint’s dried, take the orange duct-tape and wrap it all the way around the very front of the toilet paper roll (the opposite end of where the balloon is). The orange duct-tape will serve as the orange safety tip; It’s illegal to have a device that fires projectiles (besides real ammunition and metal BBs, that is) without a orange tip on the muzzle at least 3/4 of an inch thick. If you decide not to put the orange tape on the muzzle of your masterkey, then you run the risk of people thinking it’s a real firearm and can even get you in trouble with the police.
Step 5: Now take the zip-ties and squeeze them in between the piece of wood and the toilet paper roll. Since it’s made of cardboard, the toilet paper roll should bend inwards a little bit when you push the zip-ties though, giving you enough room to sneak them through. If you’re having a hard time, loosen the tape that’s holding it down. Make sure to space the three zip-ties at small intervals (one on near the end of the masterkey, one in the middle and one near the front). Don’t pull the zip-ties completely though. Pull/push them through just enough so that you have slack to go around the piece of wood, through one of the holes in the gun, out another hole in the gun, and back to the end of the zip-tie where you can pull it tight.
If you’re confused on what you’re suppose to be doing with the zip-tie then think of it this way: You’re basically tying the piece of wood to the gun, securing the masterkey. In the illustration below, the black part represents the zip-tie, the blue part is the hand-guard of the gun, the red parts are the holes on the hand-guard that the zip-tie goes through, the green part is the piece of wood, and finally the purple part is the actual masterkey which is obviously attached to the piece of wood:

So all you’re doing is completing that black loop with zip-ties in three different places.
If you’ve done it correctly, then it should look something like this:
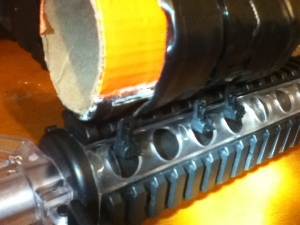
As you can see, the black zip-ties go in-between the piece of wood, through a hole on the top of the hand-guard, out a hole in the bottom of the hand-guard, and finally connects back up with the other end of the zip-tie. You can then pull the zip-tie tight and cut off the excess.
It’s recommended that you mount the masterkey on the side of the gun instead of on the bottom rail; Mounting on the side allows you to pull the balloon back further when you’re firing, creating higher velocities, and it also allows you the option of attaching a sight onto it, if you’d like. The only downside is that it’s higher profile mounted on the side, and can sometimes bump into things and break.
How the masterkey works is, when you’re ready to fire, to pour 5-10 BBs directly in to the muzzle of the masterkey and let them trickle into the balloon. You then grasp the BBs from the outside of the balloon, holding them firmly in-between the balloon so that they wont fall back out the muzzle. You then pull the balloon backwards and let it go to fire. The balloon will launch the BBs forward at about 200 FPS and has a effective range of 10-15ft.
And it’s very simple to attach a red-dot scope onto the masterkey if you want to. All you do is run a fourth zip-tie between the wood and the toilet paper roll (just like you did to mount it), except instead of going into the gun you run it over a red-dot sight and then tighten it down, keeping the sight firmly in place. The sight honestly doesn’t help too much, but it at least gives you a general idea of where you’re shooting at and it also has to “cool” factor.
Please give all credit from this project to SirBuffaloSushi and Airsofter United.

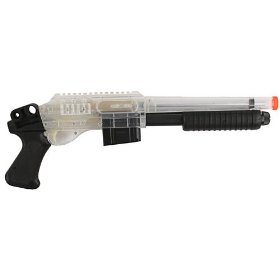 The Mossberg M590 airsoft gun comes in three different styles: Full Stock, Collapsible Stock, and Pistol Grip (seen above). It’s great to have that kind of options, and every style fits each person differently. For example, if you’re a smaller kid and still like the stock, I’d recommend the collapsible stock. If you’re looking to use for CQB (Close Quarter Battle), I’d probably buy the pistol grip version. And finally, if you were looking for a true combat shotgun to own the battlefield with and hold nothing back, I’d purchase the full stock. There’s just so many different scenarios, so just think about which one fits you best and give that a try.